Dealing With Multiple White Balance Settings in Lightroom and Photoshop

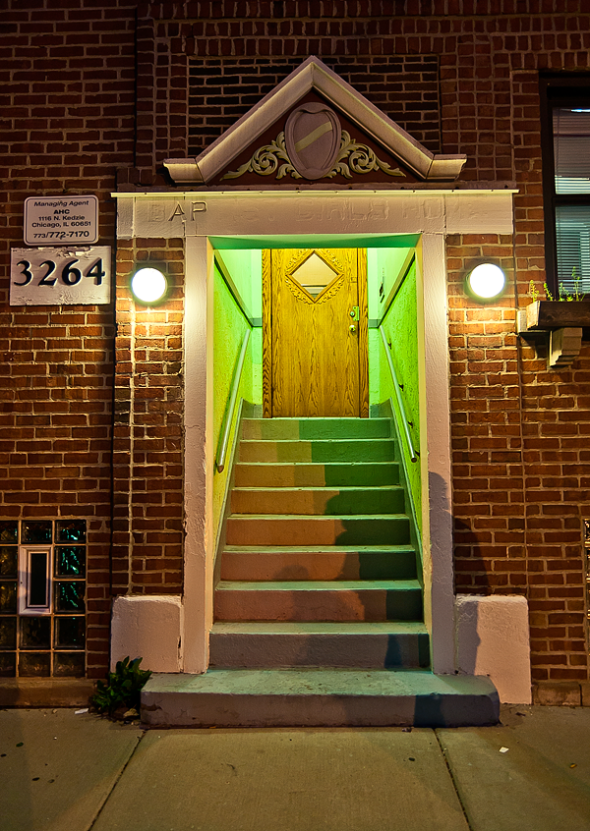
German Baptist Deaconess Home and Hospital Society (formerly) ©Rena Katinas
I walk past what was once the Baptist Girls Home pictured above, most evenings. The stair entrance is painted mint green and the combination of it with fluorescent light gives it this sickly green glow that I wanted to document with a photograph in case someone had a sudden case of good sense and changed the color/lighting combination.
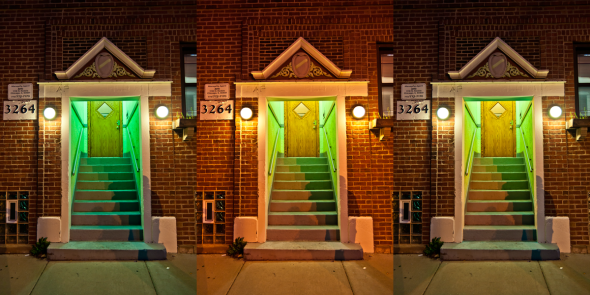
Once I brought the image into Lightroom 3 for development, I realized I had two different light sources in the shot and each had a different white balance setting. You can see in the set of photos below, that neither white balance in the left and middle image works on a whole. Even though I like the green in the Tungsten (left) version, it’s not a true color representation of the subject. The fluorescent version (middle) is right on the money as far as the stairwell and wood door are concerned, but it throws the color of everything else completely out of wack. Normally I would go to the Hue/Saturation/Luminance panel in Lightroom, to deal with off color, but I wanted to work on the wood door without affecting the brick’s color. A HSL panel within the Adjustment Brush would be a really nice thing right about now! There isn’t one, so the next best thing is Layer Masks in Photoshop.
I put the Tungsten version on the topmost layer, including a layer mask and the Fluorescent version below. After I removed most of the door and stairwell in the layer mask, I realized that I had forgotten the third light source, the street light behind me and the bottom step which had a mix of all three light sources. Using a brush set at 10% opacity, I was able to decide the light source percentages for each plane of the lower half of the steps and the sidewalk, by selectively painting back into, or removing from the mask layer of the channels palette.

Mask in channels palette
Once I put the almost final image in this post, I noticed three blue shadows, that must have something to do with the change in color space from Photoshop to the browser window, so I’ll have to figure out what’s going on there. Bottom line, it would be nice if there were a way to have multiple white balances along with Hue/Saturation/Luminosity, using the Adjustment Brush in Lightroom, but thank goodness for my old friend, Photoshop’s layer mask feature until then!


